
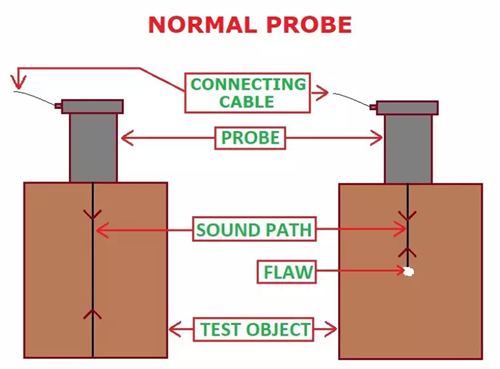
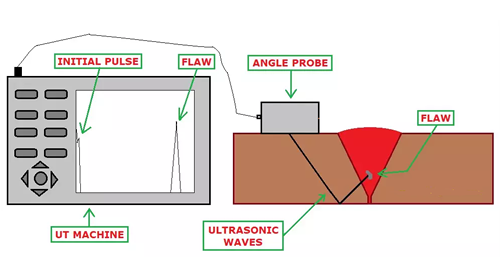
High frequency sound waves (frequency > 20000 HZ) also known as ultrasonic waves are introduced in a test object through a probe, these waves travel through the material on a predictable path. The waves are reflected at interfaces or other interruptions or discontinuity. The reflected waves are detected and then analysed for the possibility of any discontinuity in the test object.
Sound beam is emitted through a probe. The probe is made up of a piezoelectric material. Piezoelectric material has the ability of converting mechanical energy into electrical energy. It is reversible, hence an electrical energy can be converted into mechanical energy or sound energy. The probe receives electric signal from the Ultrasonic machine and converts it to sound beam, these sound beam travels into the test object and gets reflected at interfaces or discontinuity, the piezoelectric material (in probe) converts the reflected sound beam into electrical signal that can be displayed as visual signals on cathode ray tube (CRT) or liquid crystal display (LCD) screen of the machine. Three types of probes are generally used in industries.
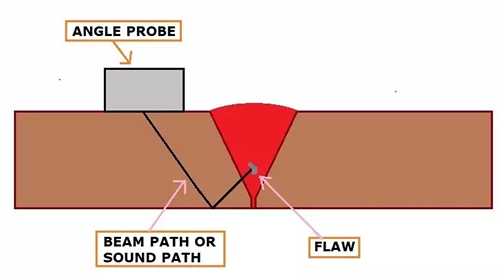
The normal probe emits sound energy at right angle to the transducer whereas, the angle probe can emit sound energy at an angle. Three types of angle probes are very popular among the industries, these are:
1. 45 angle probe
2. 60 angle probe
3. 70 angle probe
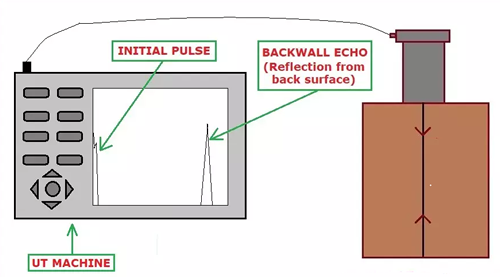
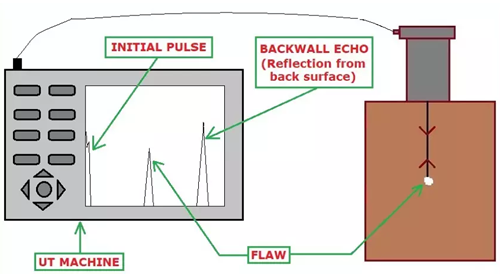
Normal Probe Scanning: Waves emitted by a normal probe gets reflected at the interfaces or discontinuity (i.e at the change of medium), this is illustrated in Fig.3 and Fig.4. In Fig. 3, waves gets reflected at the back surface and the resulting echo is known as a Backwall echo. Whereas, in Fig. 4 some of the transmitted waves gets reflected at the flaw, hence two echoes are visible in the machine, one is for the flaw and the other one indicates the backwall.
Angle Probe Scanning: Fig.5 shows an angle probe, Some part of the transmitted waves gets reflected at the flaw and the resulting echo is visible in the machine.

 鲁公网安备 37020602000203号